
I want to let you know that this has worked for me on both the Orange Pi 5/Orange Pi 5 Plus and the Raspberry Pi 4/5 hardware.
Proxmox is one the best Open Source Apps/Programs that has ever been thought up. Virtualization has been gaining popularity for almost 20 years. With the emergence of the ARM Processor & SBCs, also their importance in to the IT world it was just an inevitable move for the folks at Proxmox.
The SBC world has come a long way these days. You have the Raspberry Pi 4/5, Orange Pi 5, RockPi 4/5b and so on. They all have a pretty solid hardware and platform to hang their hat on. Whether they will ever be a true challenge to the x86_64 who knows. However they are now with 4,6, and 8 cores; 2/4/8/16 and 32 gigs of ram. Therefore they have enough resources to run a Virtualization platform/OS on them. In this article we will cover how to deploy such a platform and use it to its full potential on the ARM technology.
note: You will need the Orange Pi 5 bookworm image to do this: Armbian, Orange PI 5 OS, & Orange Pi 5 Plus. PLEASE USE Debian Bookworm.
1 – Burn the OS to your storage device (UB,SSD,nVME)
Use Balena Etcher:
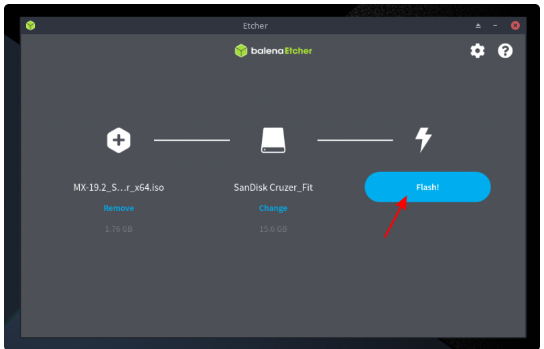
2 – Put the Sd Card/USB Thumb Drive in the device and power it up.
note: I have an SD Card that has the Orange Pi 5 OS (Debian Bookworm OS) from the Orange Pi 5 Site Any of the images listed on this page should work for this.
I use this site to burn the OS to the eMMC/NVMe/HD.
3 – Find the IP of the device in question. (I use Angry IP Scanner)

4 – ssh in the device: ssh user@ip_addy_here
sudo ssh root@ip-address-here
note: Change the default password for the default user.
5 – sudo passwd orangepi
note: Let’s create a root password you will need it.
6 – sudo passwd root
note: Now let’s add all of your Cluster host addresses.
7 – sudo nano /etc/hosts
Example Below:
ip_addy_here | host_name_here.fqdn.dom | host_here
192.168.0.10 node01.server.loc node01
192.168.0.11 node02.server.loc node02
192.168.0.12 node03.server.loc node03
note: Let’s Become root.
8 – sudo -i
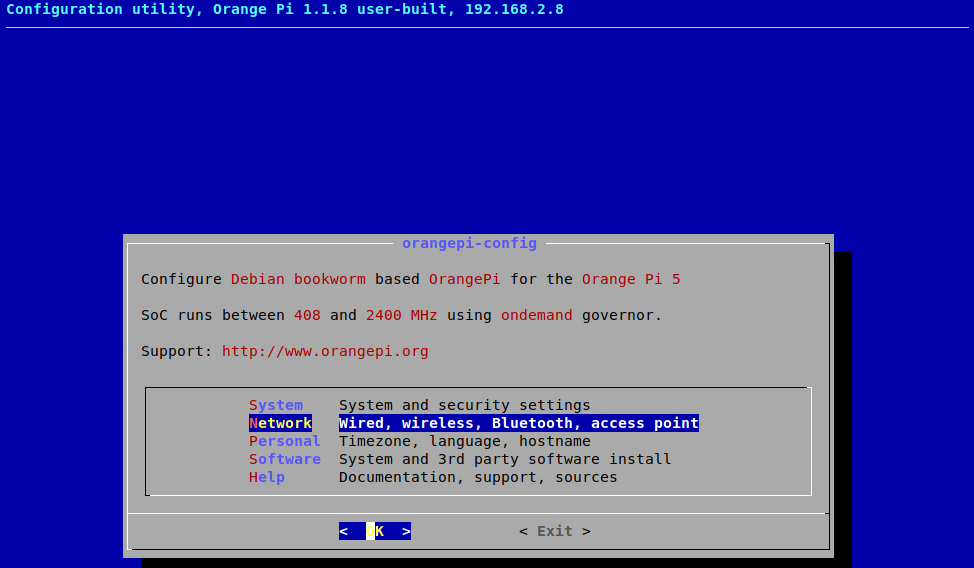
note: Let’s Configure the Server with orangepi-config. We will set the region, hostname, & Static IP addy here.
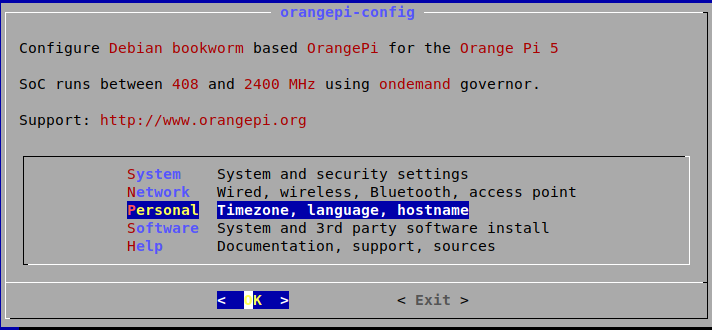
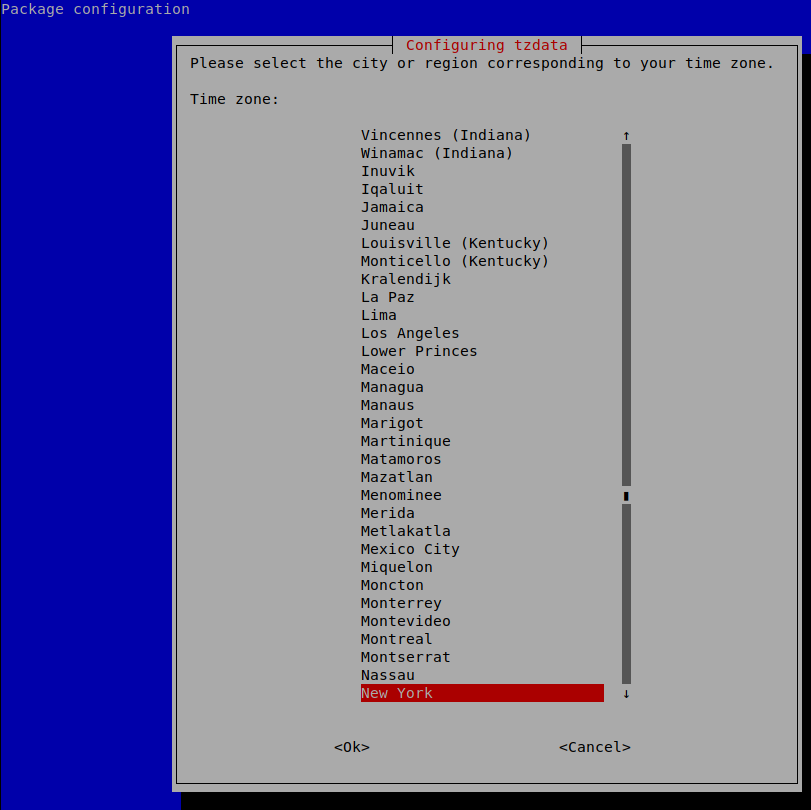
9 – Open orangepi-config Then > Scroll down to Personal >> Timezone >> Americas >> New York >> Ok

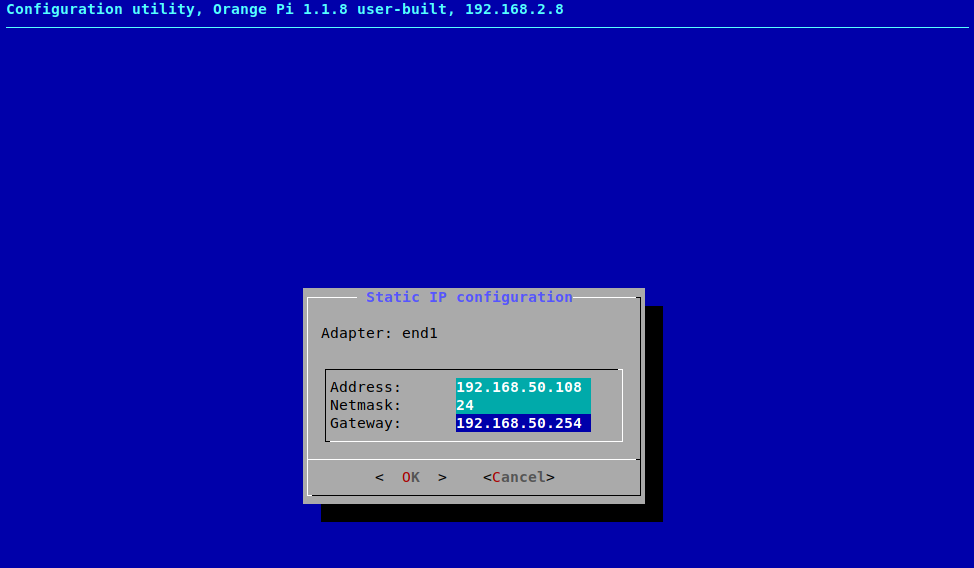
>> Back >> Network >> IP >> OK >> Address >> Netmask >> Gateway >> OK >> back >> exit
note: Let’s add the Proxmox Repository to our server.
10 – echo ‘deb [arch=arm64] https://mirrors.apqa.cn/proxmox/debian/pve bookworm port’>/etc/apt/sources.list.d/pveport.list
note: Let’s add the GPG Key to our server.
11 – curl -L https://mirrors.apqa.cn/proxmox/debian/pveport.gpg -o /etc/apt/trusted.gpg.d/pveport.gpg
note: Let’s update the Repositories and OS Packages
12 – apt update && apt -y full-upgrade
note: Let’s add the Nic management app to our server
13 – apt -y install ifupdown2
note: Let’s now install Proxmox, Postfix, open-iscsi – incase needed.
14 – apt -y install proxmox-ve postfix open-iscsi
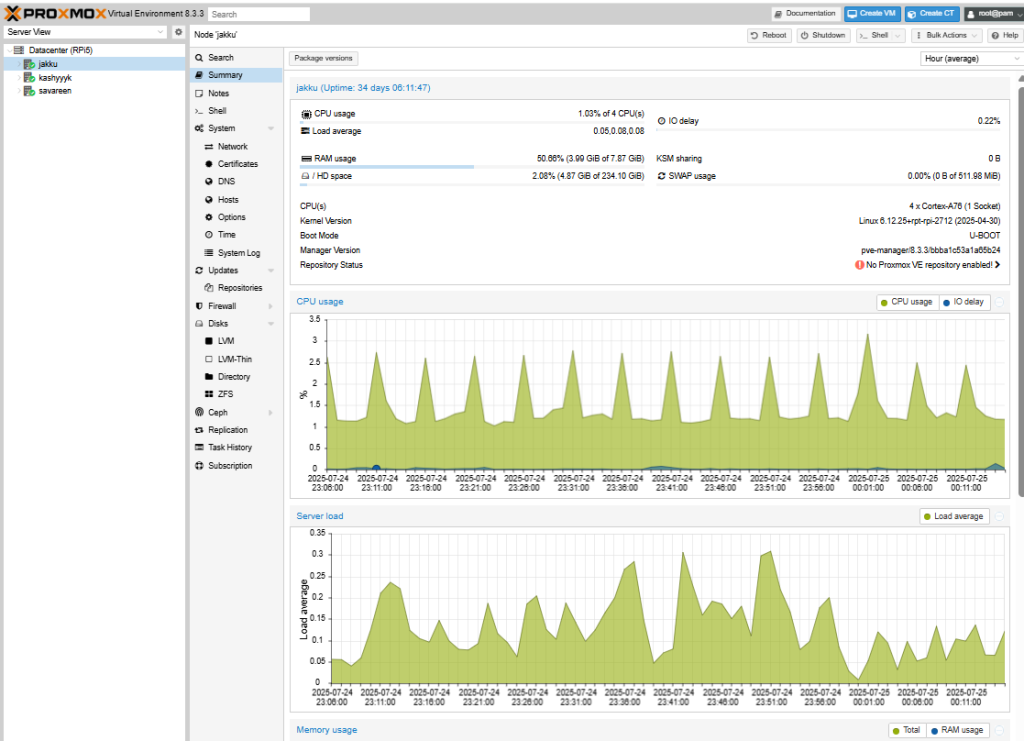
Now you should be able to go to the https://server_ip:8006 and login as root with password you created in step 6.
15 https://server_ip:8006
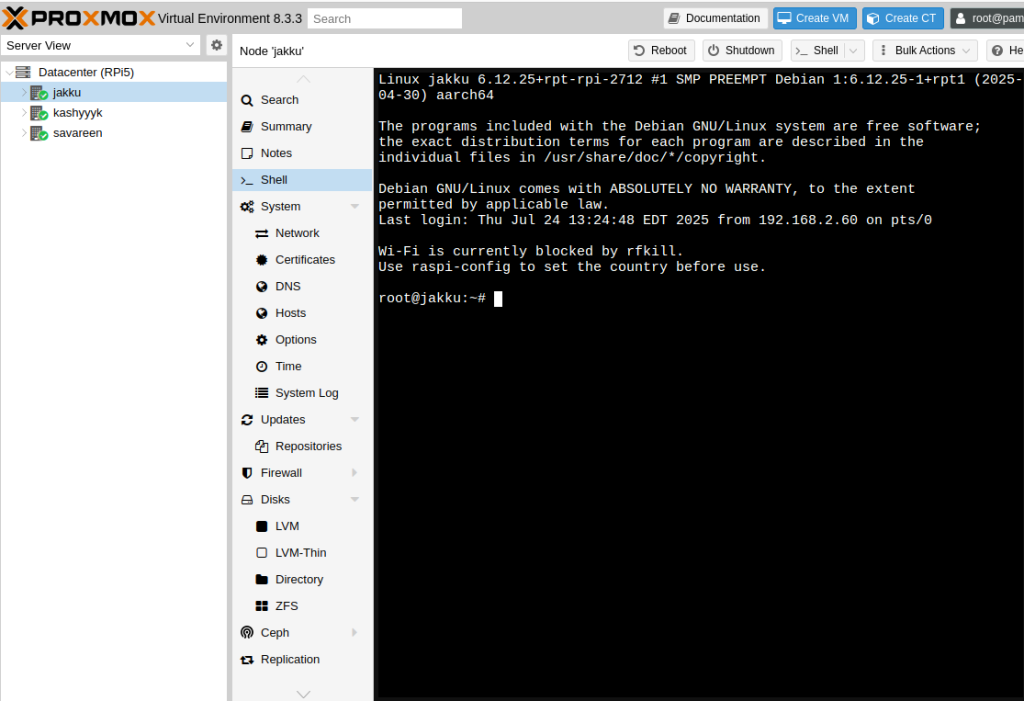
note: Goto the Host >> shell
note: We need to download and Install the firmware patch for the rockchip. So that it will function normally/properly with the Proxmox-Port
16 – apt download pve-edk2-firmware-aarch64=3.20220526-rockchip >> press enter key
note: There is a newer version of the pve-edk2 but it didn’t work for me so I had to re-install the 3.2 version to get it to work.
17 – dpkg -i pve-edk2-firmware-aarch64_3.20220526-rockchip_all.deb >> press enter key
note: Now I will show you how to Create a Container in this Proxmox environment.
18 – right click > create CT
19 – give it a name and set your pass word.
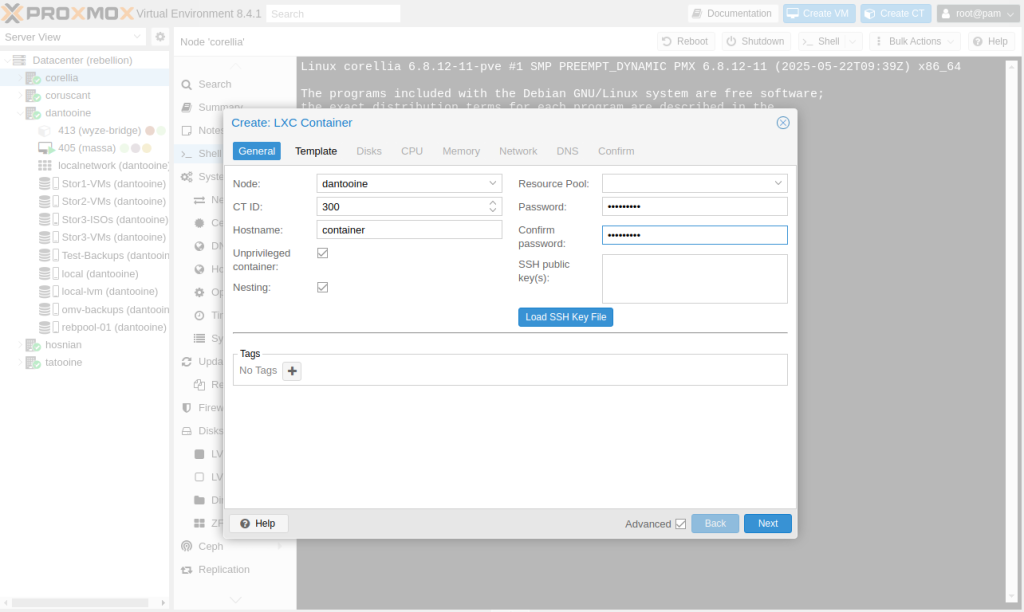
20 – Choose your Template.
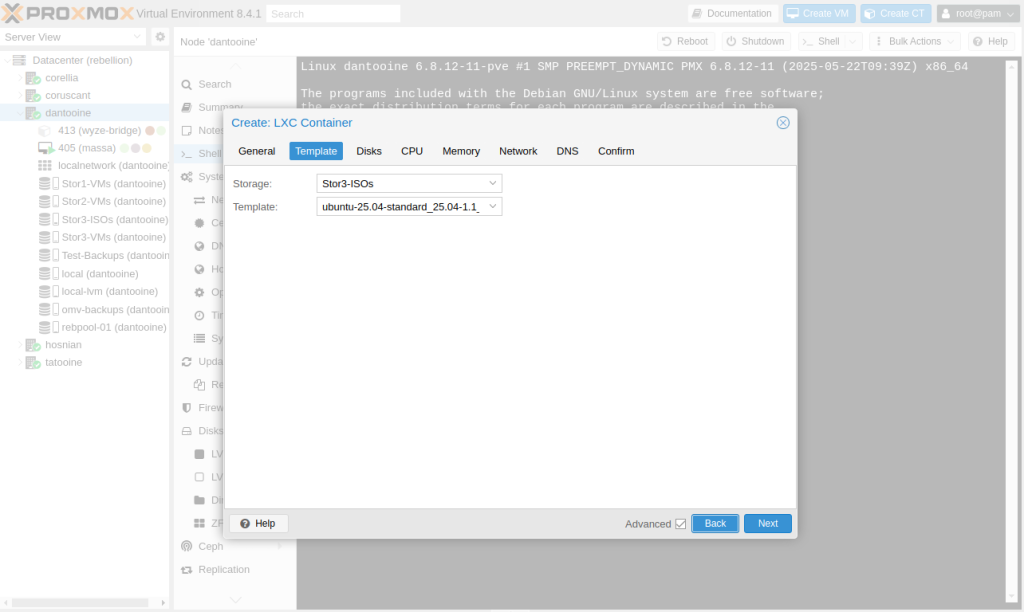
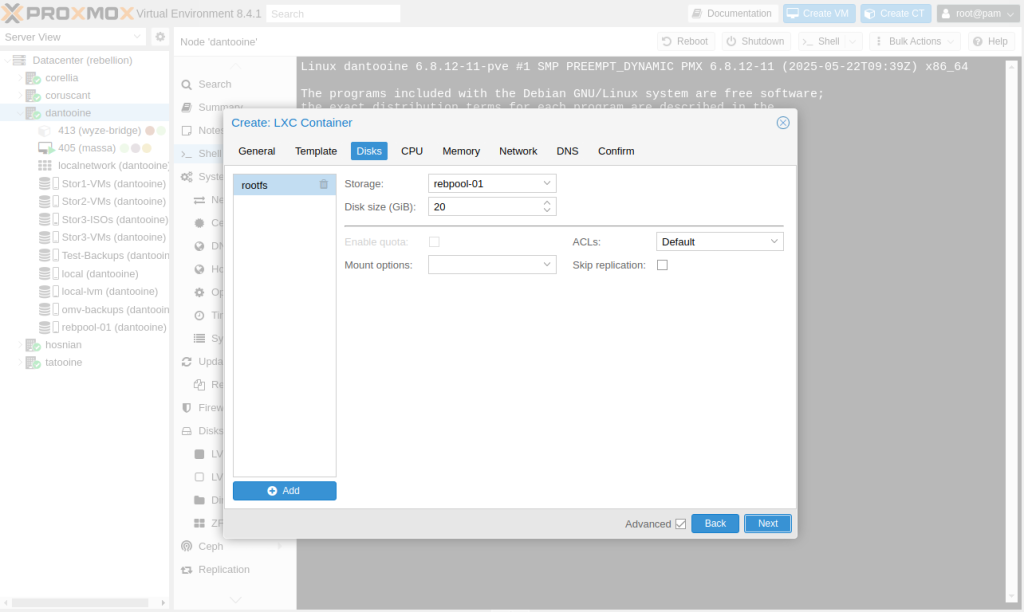
21 – Choose your storage location.
22 – Choose your cores.

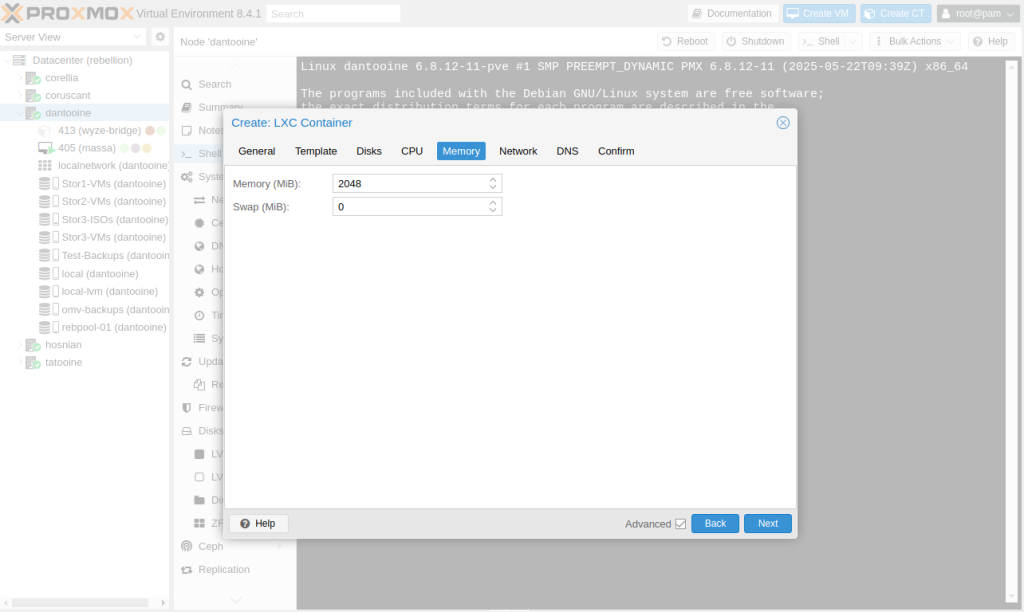
23 – Choose your memory.
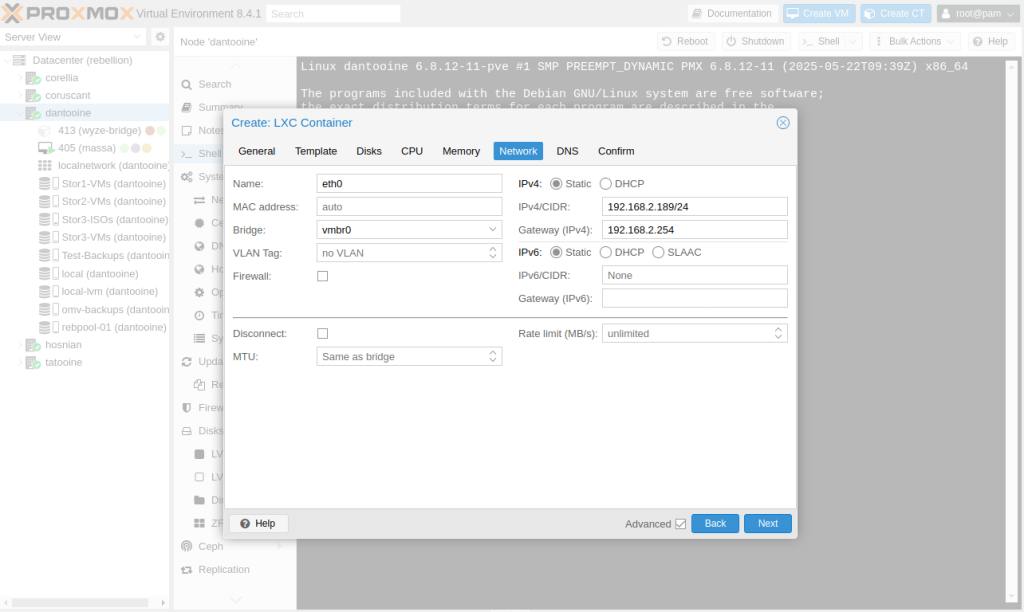
24 – Configure your network.
25 – Configure your DNS.

26 – Confirm your configuration.
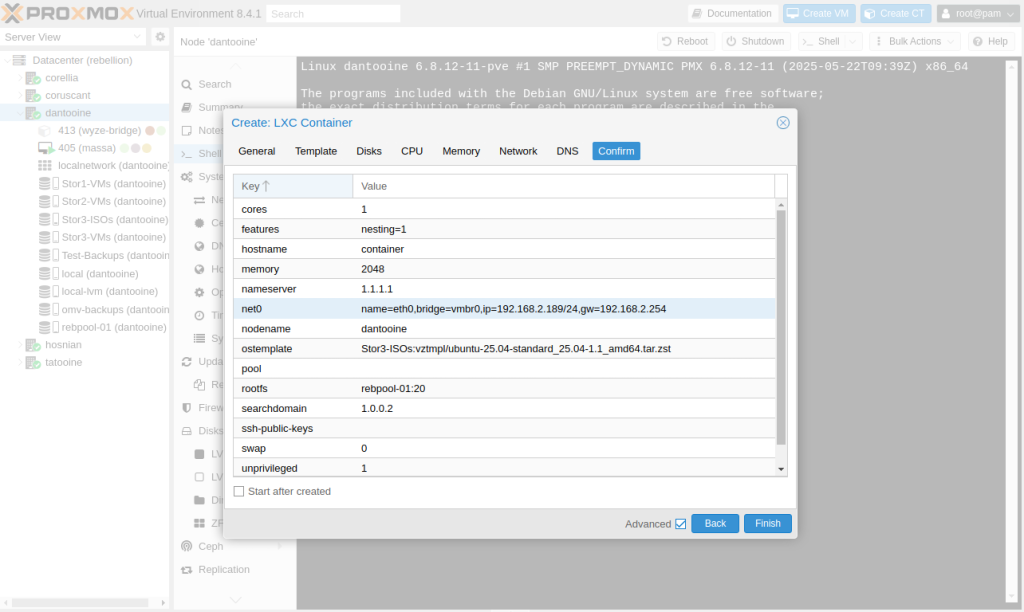
27 – Start your Container after it completes.
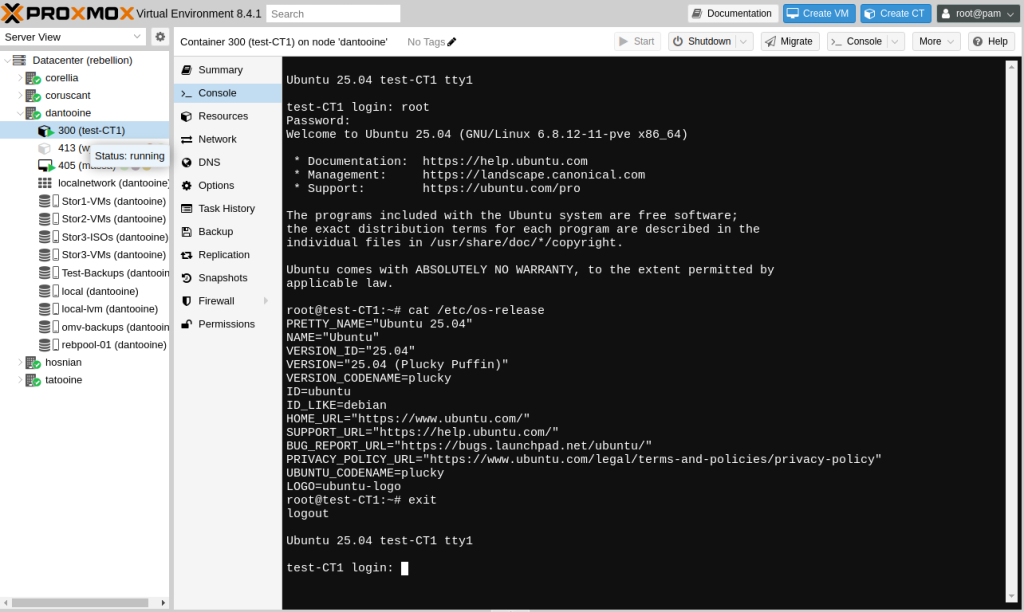
You should now have a working Container with whichever template. Just check it out by logging in to it. You can do it through the PVE Console or ssh into it.
note: Here is how to deploy a VM in this environment.
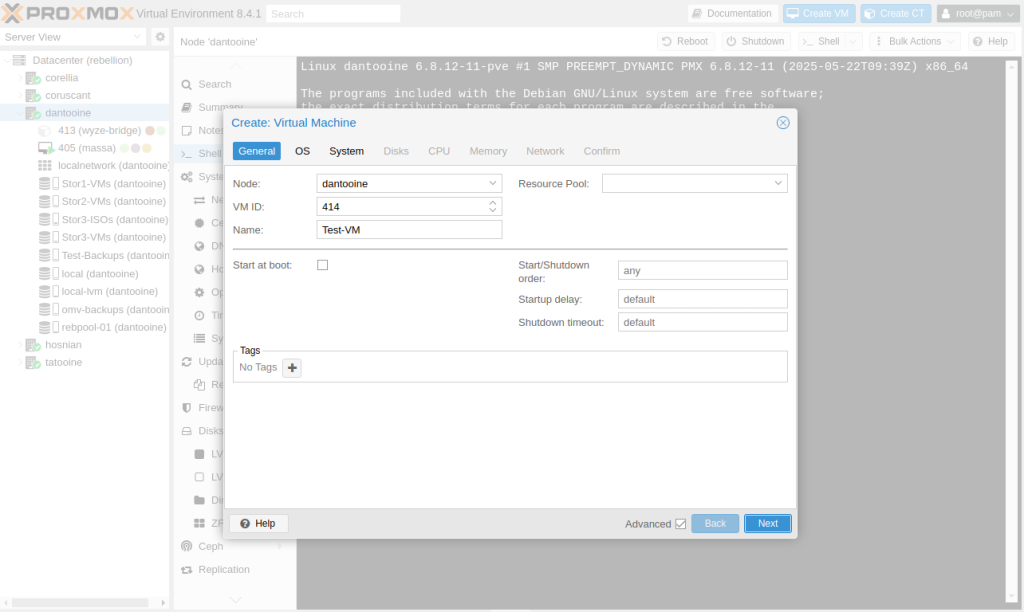
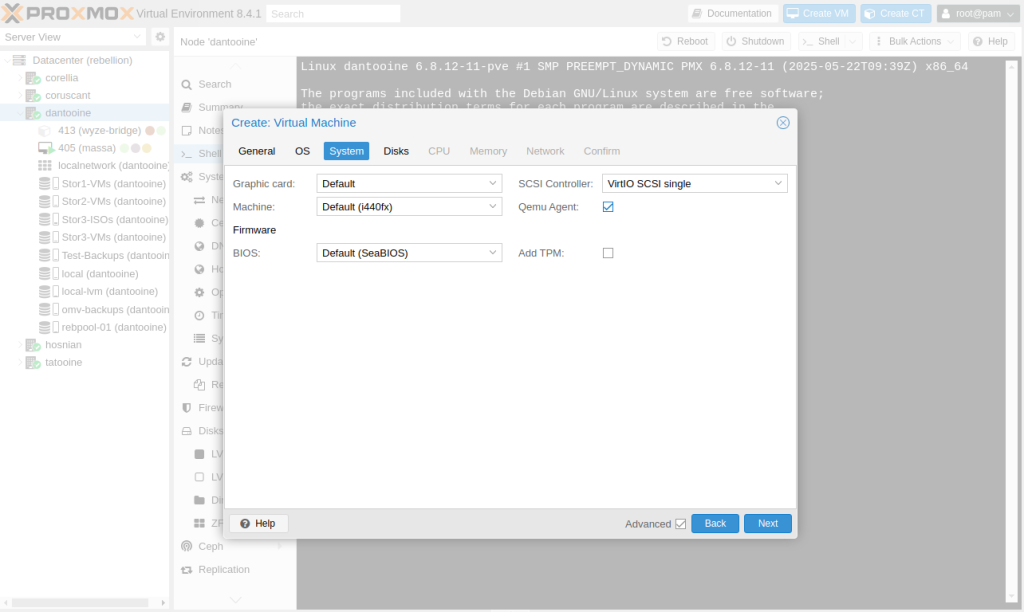
28 – right click > create a VM
29 – Give your VM a name.
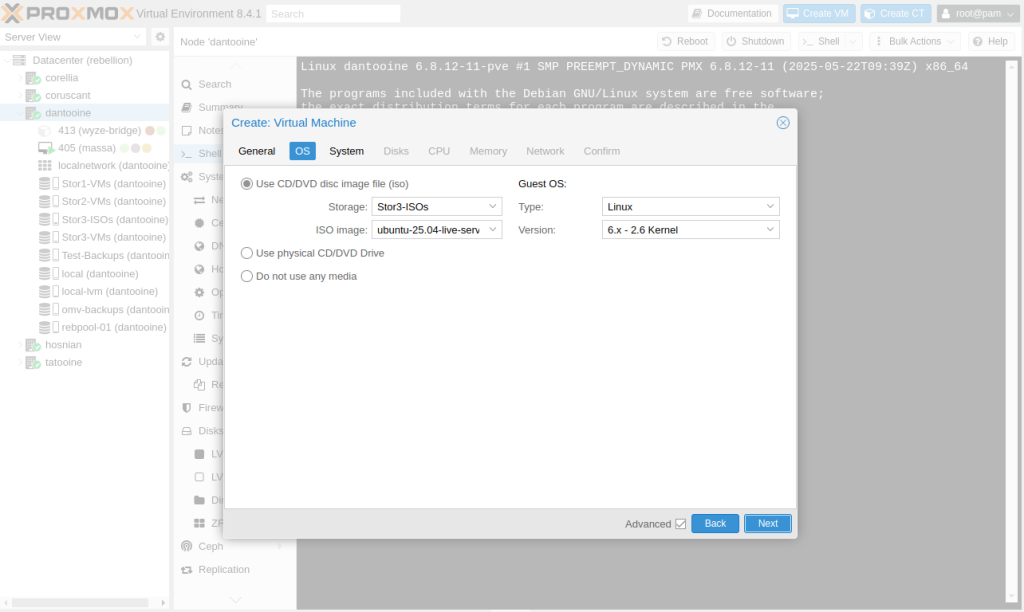
30 – Chose your image to deploy.
31 – Make sure you check the Qemo Agent check box.
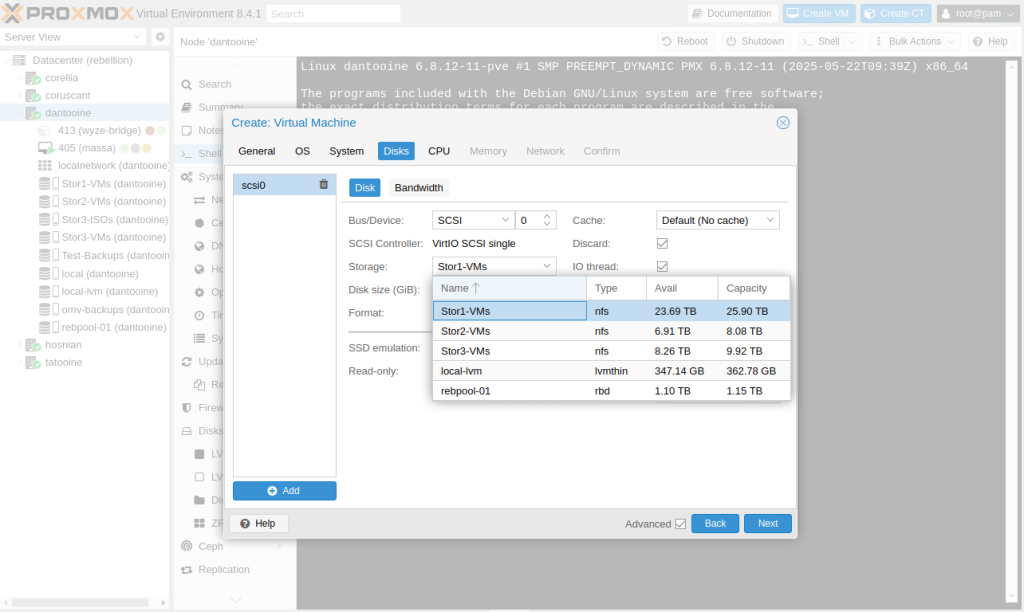
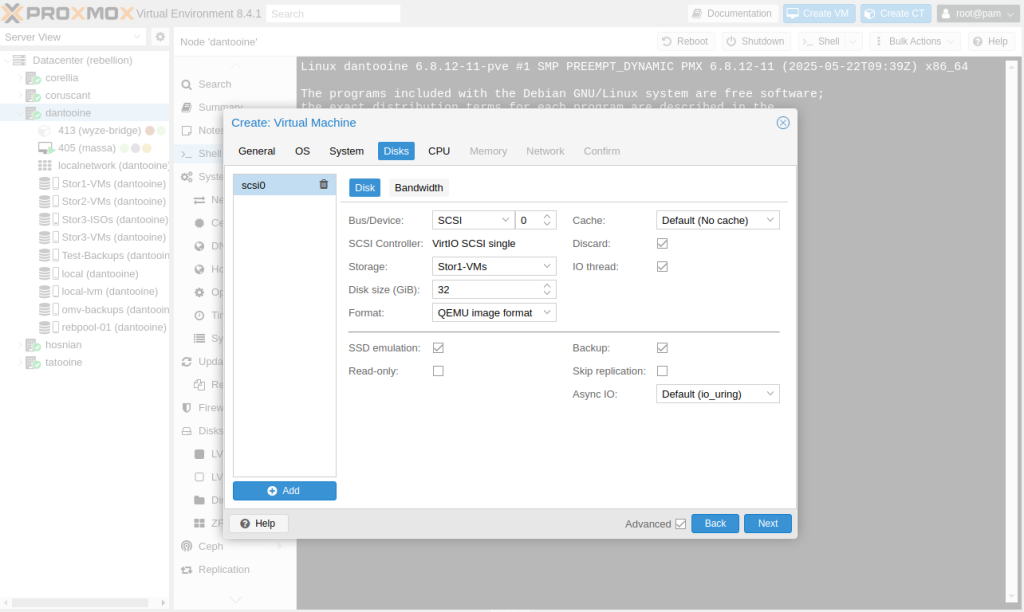
32 – Choose your storage location (Configure exactly like mine).
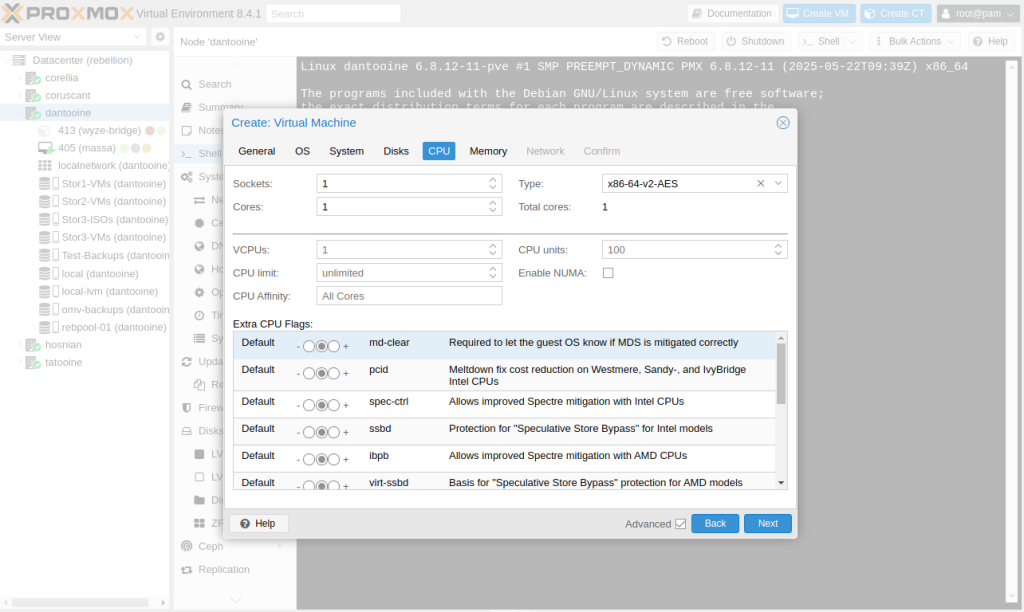
33 – Configure your CPU.
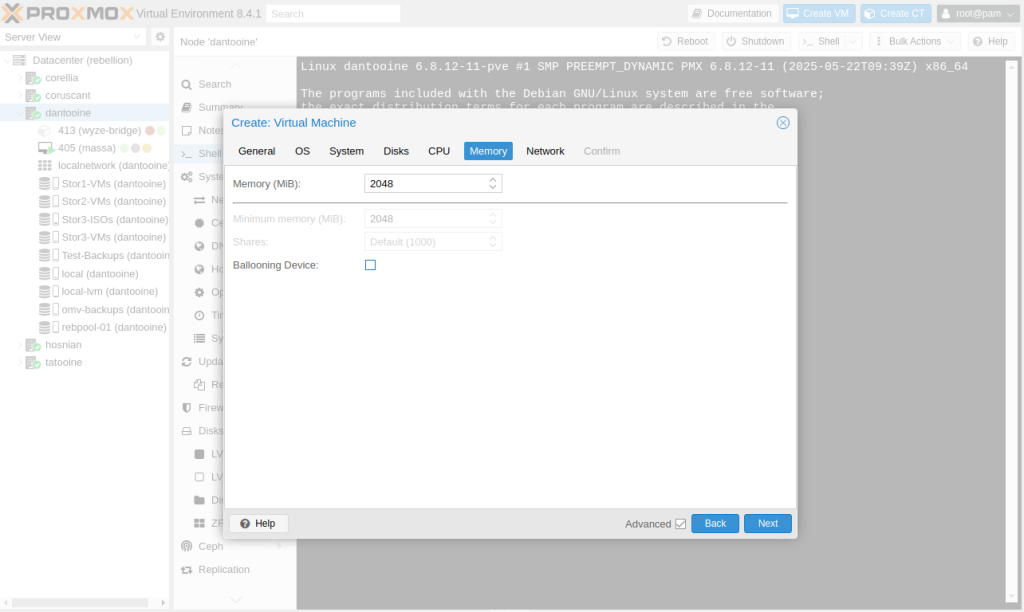
34 – Configure the memory.
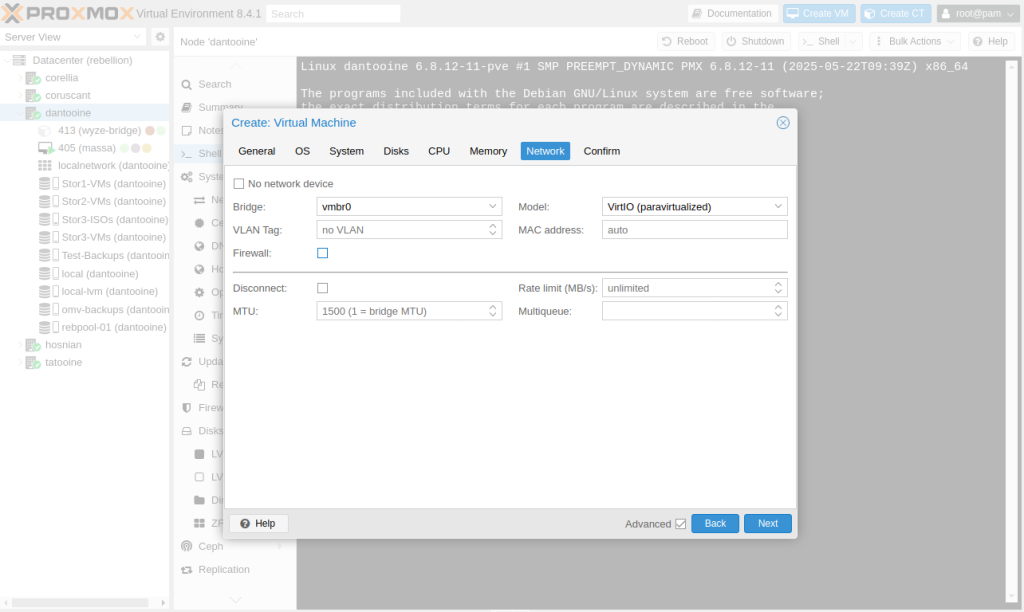
35 – Configure your network.
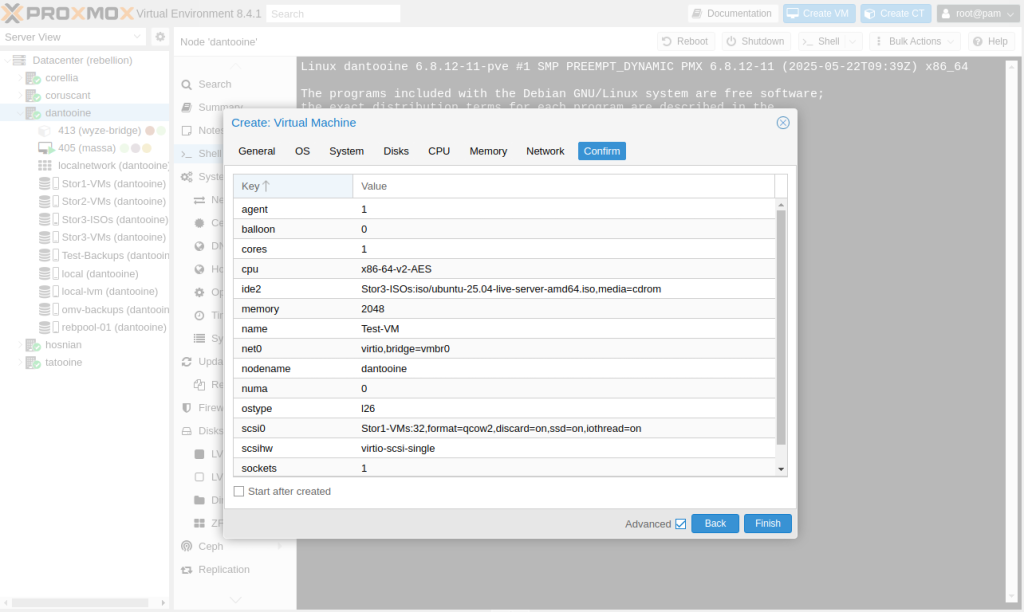
36 – Confirm your choices.
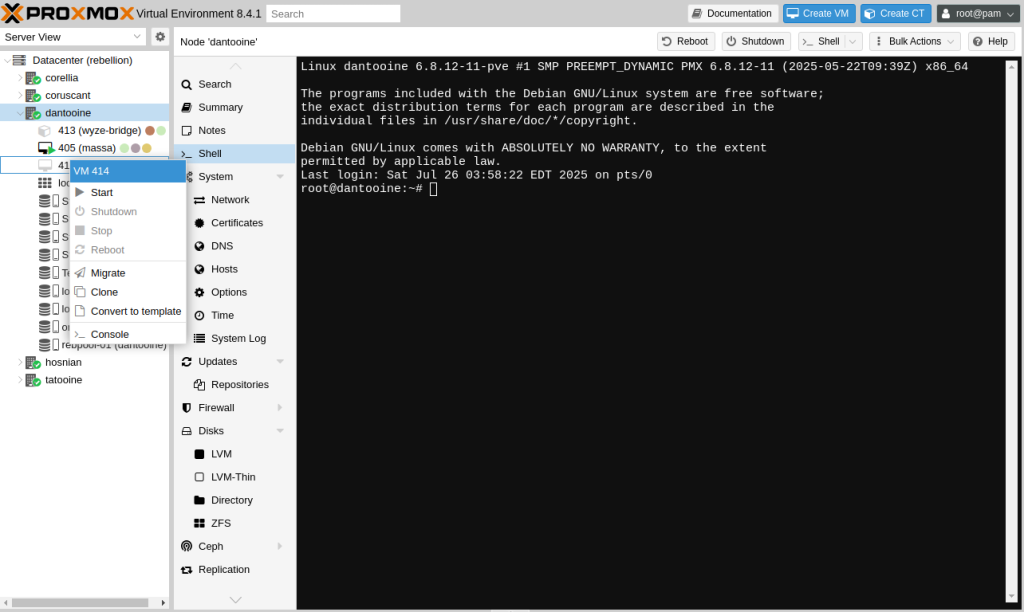
37 – Right Click on the VM and Choose Start.
At this point you should have a working VM, Check it out and ssh in to it.
Tips and Tricks / Troubleshooting
I ran in to a period when no matter what I did it wouldn’t let me create a VM at all.
I could create Containers all day long no problem. This went on for about 2 months because
I was to lazy to troubleshoot it. Then one morning I was sitting here at my pc trying
to figure out my next project. I thought wait I am not able to create VMs on the OPi5 PiMOX Cluster let’s try to figure it out. So the first thing I did was an
apt update && apt -y upgrade
When that was done running, there is a command you have to run to make sure you have the rockchip firmware up-to-date or installed:
dpkg -i pve-edk2-firmware-aarch64_3.20220526-rockchip_all.deb
I then ran it of course and when I was done with those two things, I decided to try to create a VM and walla it worked. I was so happy I dang near crapped myself. I have been wanting to get rid of all the Intel/AMD Proxmox hosts for a long time. I mean after all I do run a website geared towards the use of SBCs in our world of it correct? So the gist of this is make sure you have update/upgraded and also make sure your firmware is up-to-date. That’s all for now thanks for stopping by.