
Important note you should use a nVME Drive for this.
Proxmox is an awesome open source virtualization tool. In my mind it rivals VMware very well. It does a lot of things and is easier to manage an configure. You get the full onslaught of the Virtual Environment you would look for in either a homelab or in the Enterprise. I am really surprised more companies do not use Proxmox. So here we go with our tutorial:
Note: This guide is for version Proxmox/PiMOX 7.2.7. If you are wanting the newer Proxmox v8.1.3 go here.
1- Let’s burn Orange Pi 5 OS – Debian Bullseye to a SD Card (Use RPi imager or Balena)
2 – Download the official Debian Image from here.
3 – Install the OS either on your SBC Device or VM
4 – ssh user@srv_ip <enter>
5 – sudo -i or sudo -s <enter>
note: change your default password & Set your Static IP
6 – passwd orangepi <enter current password> it should be orangepi
<enter new password> and then confirm your <new password>
note: Let’s set a static ip
6 – orangepi-config > network > IP > Static > “Put your iP info here” > back > back > exit
The above could be armbian-config if using arbian v23.8.1
note: update the repository & the OS packages.
7 – apt update && apt -y full-upgrade <enter>
Let’s reboot the system to let changes take affect
8 – reboot <enter>
Check that you have the OS you want.
9 – cat /etc/os-release <enter>
Use this to install PiMOX (The command on #10 did not work for me….Follow the Alternative install procedure.)
10 – sudo -i
copy and paste the following as root.
11 – curl -L http://bit.ly/3K4x8Tr | bash <enter>
If it gives you an error ctrl-c and continue below.
### Alternative Install Procedure ###
note: The above didn’t work exactly as I thought it should there for I had to take some extra steps to get it working. (Please do this as root sudo -i) They are below:
# Check the current directory for scripts #
12 – ls -al <enter>
Make the script executable
13 – chmod a+x RPiOS64-IA-Install.sh <enter>
14 – ./RPiOS64-IA-Install.sh <enter>
This is the end of the PiMOX install goto https://your_srvr_ip:8006
note: ssh into your new pimox host and do type the following in a terminal:a - sudo -i
b - apt -y full-upgrade
c - apt -y install ifupdown2
# Let’s make local storage availble to test with. I have tried several ways to use shared storage but it didn’t work as of yet. I was able to add storage and after creating the Vm and starting it on local-lvm. I was able to stop the VM and to move the storage to the shared storage and it worked after I restarted the VM. #
15 – Login to Pimox/Proxmox
16 – Goto > Datacenter > Storage (Click the edit Button) > Under Content types Make sure ISO Image, Container, Container Template,Disk Image are selected.
Bonus link is to “How to deploy a VM on PiMOX“
# Let’s get some templates to experiment with. The link below has more than just Ubuntu OS there. #
Container Templates
Use the one with latest date (i.e. 08/23/2023 as of this writing).
When you get there you want to download rootfs.tar.xz
rename this file to ubuntu-jammy-lxd-image.tar.xz
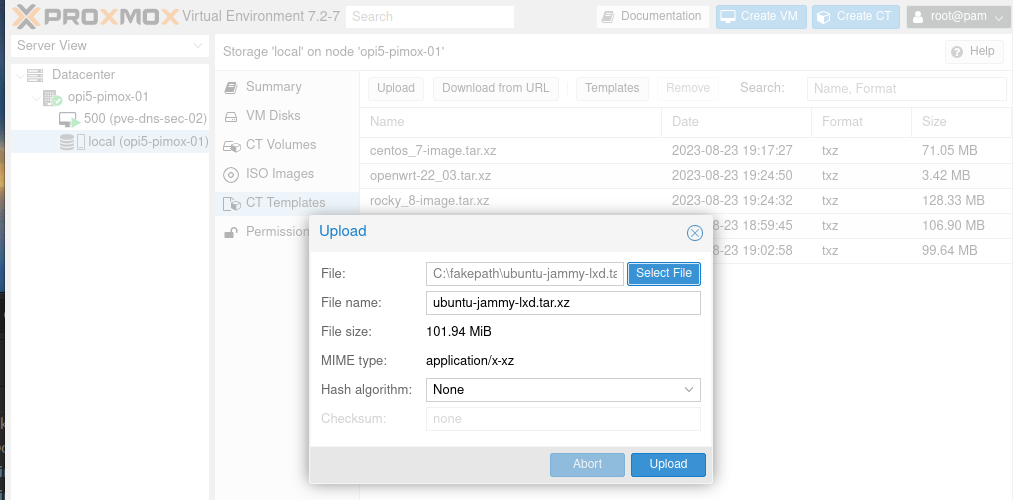
When it is completed it will let you know. Close the Window
and you should see the template there.
Let’s create our first container and test it to see if it works.
17 – Login to PiMOX/Proxmox
18 – DataCenter > Click Create CT (Should be the upper right corner)
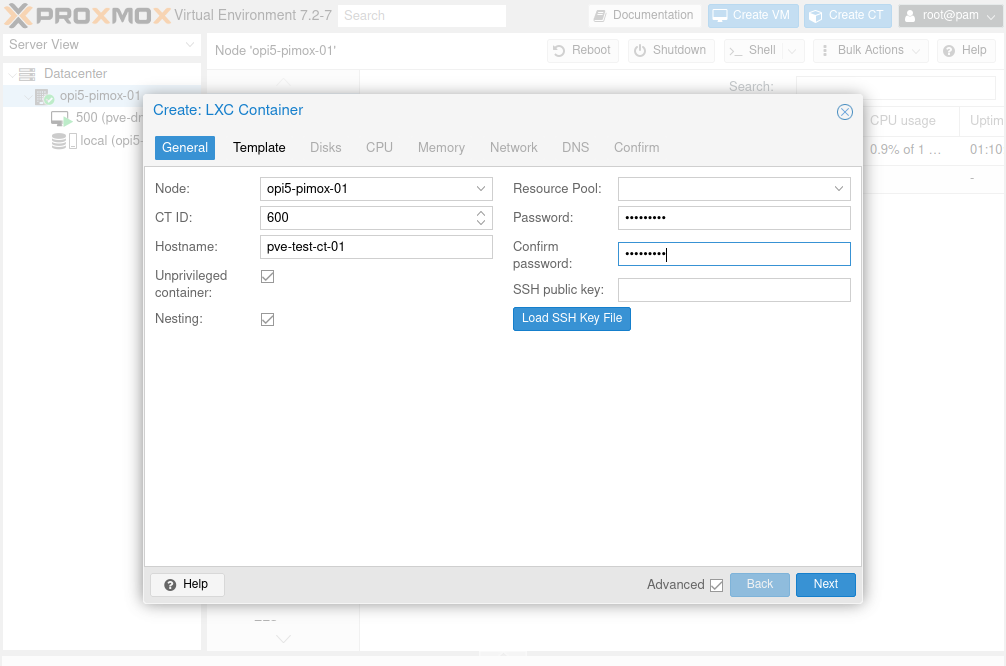
19 – Choose the node you want the Container on Node:
20 – I use different IDs for mine so put in your CT ID
21 – Give your system a name – Hostname
22 – I uncheck the Nesting box, you won’t need that one this container.
23 – Put in a Password and confirm the Password then click next
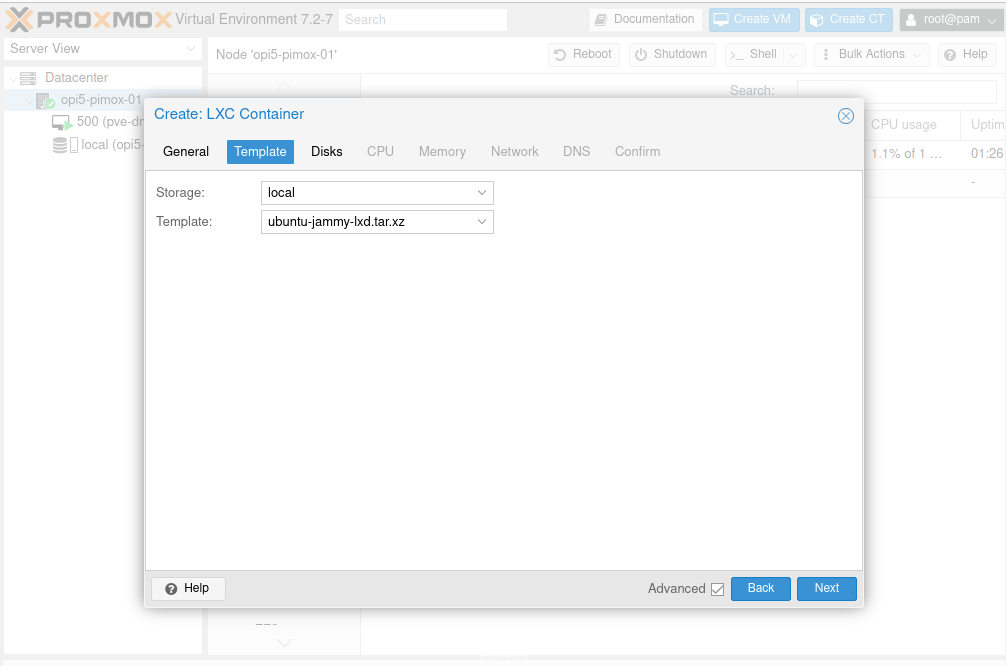
24 – Choose the Template location and your Template then click next:
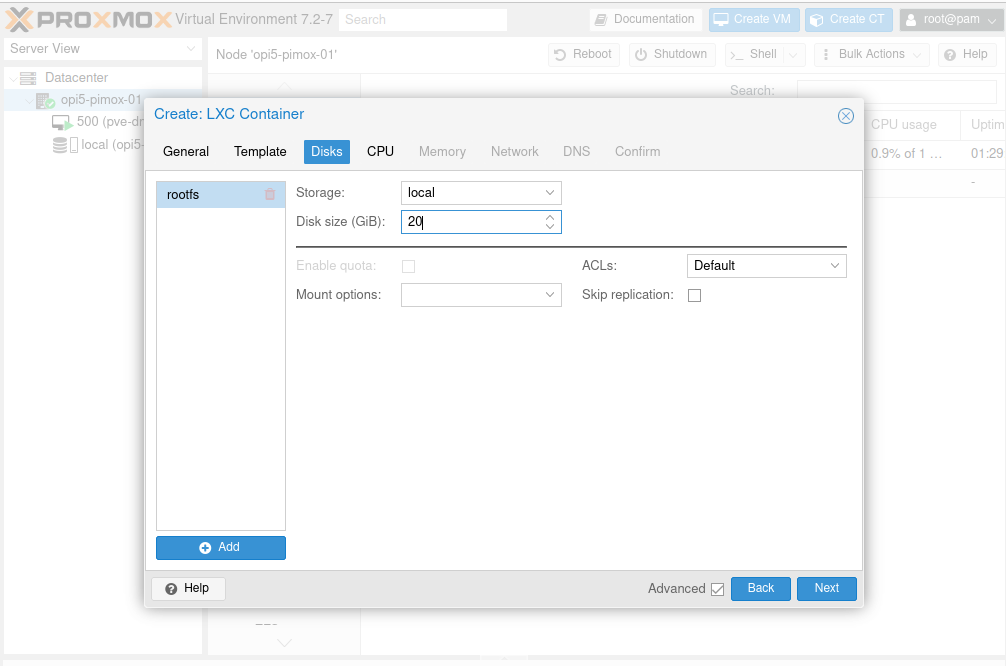
25 – Choose your Storage and Set the Size, then click next:
26 – Choose number of cores then click next:
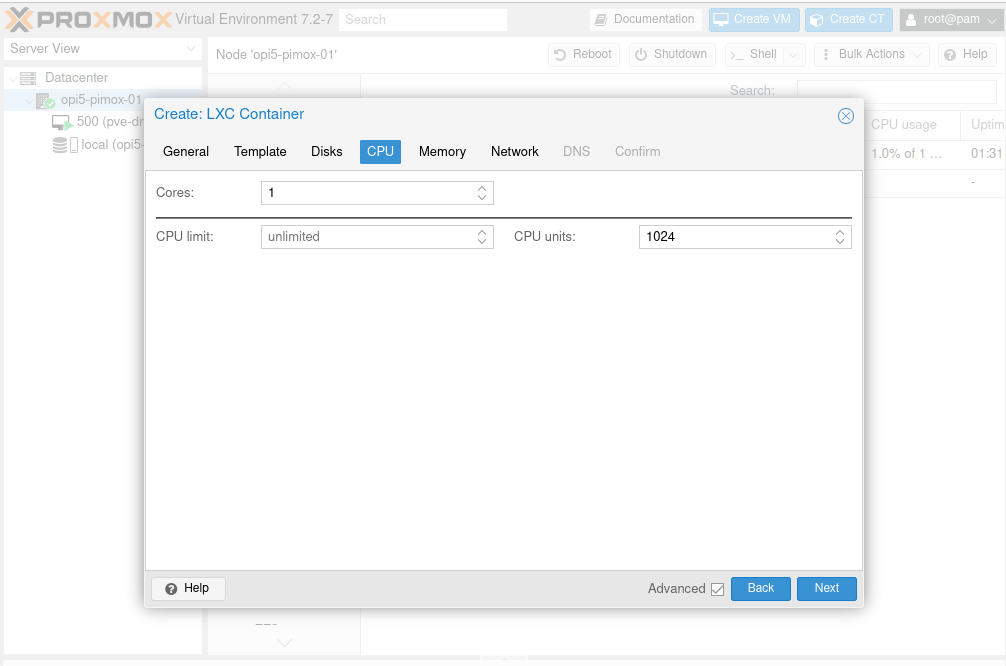
28 – Choose Memory size i.e. 2048 MiB then I always set swap to 512 MiB, click next:
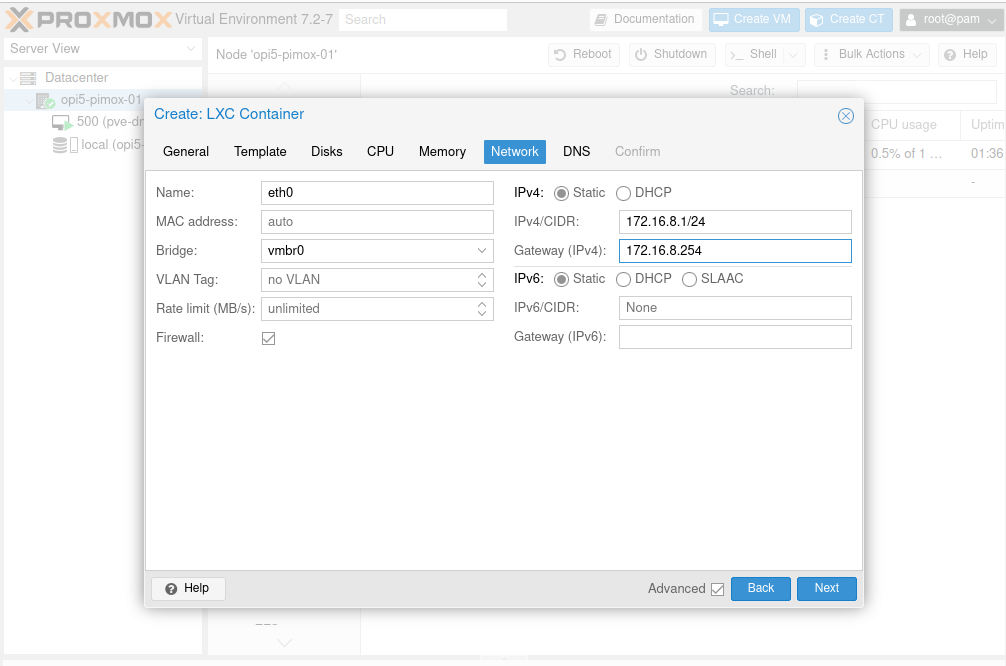
29 – Make sure your Nic is correct, Make sure the bridge is selected, uncheck firewall box, IPv4/CIDR must gave it in this format click next:
30 – I always leave these two balnk so it uses the hosts DNS, If you want a specific DNS put a DNS IP in domain (Primary) and put a DNS IP (Secondary) in DNS Servers, click next:
31 – This is the config confirmation, if you are good with all your choices, then click next:
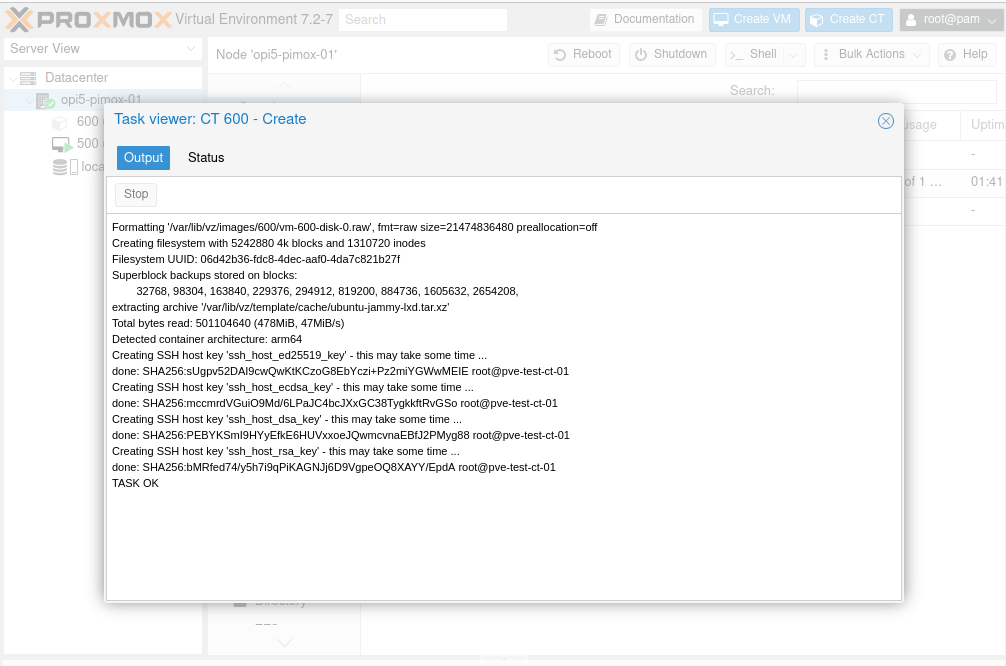
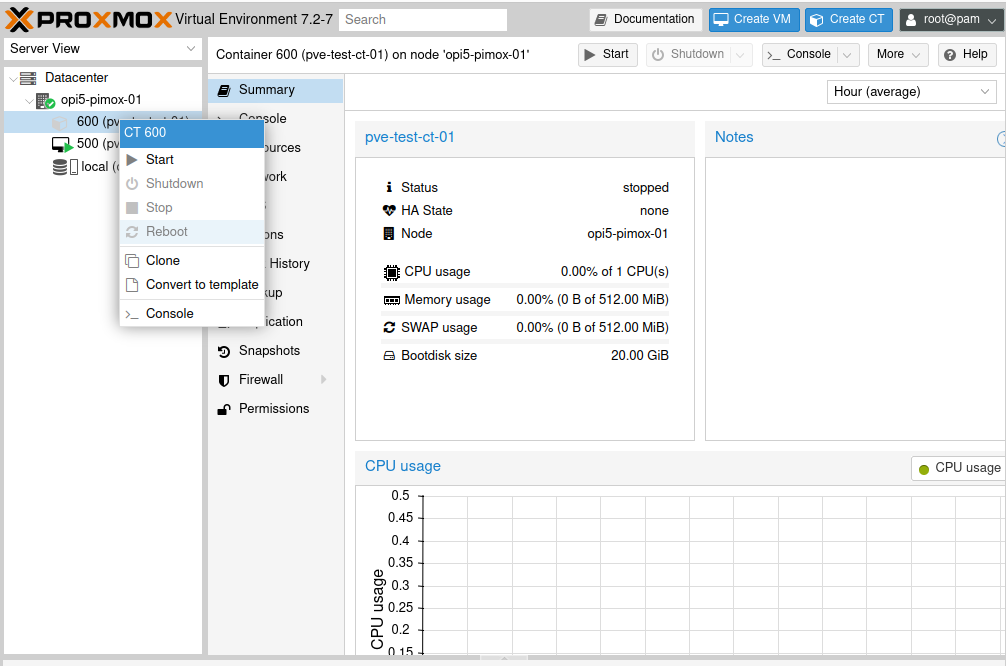
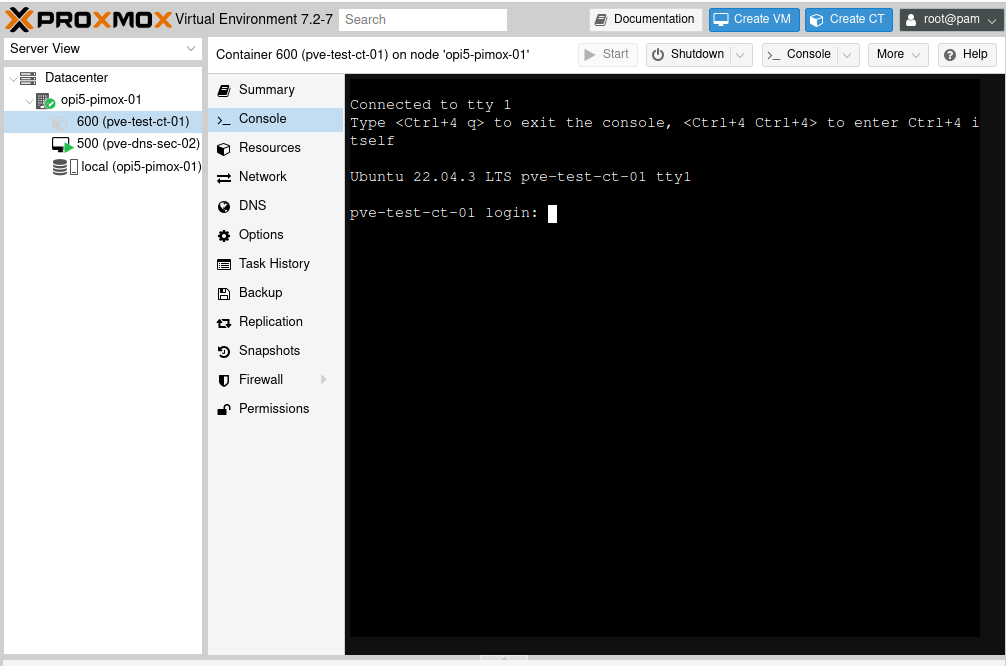
32 – Right Click your CT (Container) and click start:
The credit for the original article goes to l422y from the Discord OPi5 Server, His link is here.
You have a working container, have fun building what you want with it. If you need assistance please feel free to email us here Support.
Thank you for coming by and staying with us for a bit. Please have a magnanmus day!